![What-is-Scheduling-in-Project-Management--[Complete-Guide]](https://e3m3v6b5.rocketcdn.me/wp-content/uploads/2025/01/What-is-Scheduling-in-Project-Management-Complete-Guide.png "What-is-Scheduling-in-Project-Management–[Complete-Guide]")
In this complete guide we’re going to cover absolutely everything you need to know about project schedule management.
Scheduling is so important for project management because it helps you stay on track and ensure you deliver work on time and of a high quality.
In this guide, we will touch on AI but also on different project scheduling techniques, the benefits, plus how to create your own project schedule and some tools to help.
Let’s dig in!
What is scheduling in project management?
Scheduling in project management refers to the organisation of tasks, deliverables, resources, and anything else required to complete the project successfully.
A project schedule usually revolves around a timeline that includes a start and end date, plus the estimated time it takes to complete each task, the resources required, and the team member who is responsible.
What’s included in a project schedule?
When you’re planning your project out it’s important to create a project schedule that will help to guide you as things progress.
When scheduling your project, you should include:
– Deliverables
– Tasks
– Task dependencies
– Start and end dates (of both the project as a whole and each task)
– Resources (the project team)
– Stakeholders
– Project budget
– Review points and methods
– Risks and constraints
– Communication plan
4 project scheduling techniques
Project scheduling is important and should not be underestimated as part of your project management process. Luckily, you don’t have to jump into this completely blind as there are many tried and tested project scheduling techniques available. Let’s take a look at the most popular…
1. CPM
CMP stands for Critical Path Method. It’s a project scheduling technique that helps you to calculate the shortest route to project completion.
You start by identifying all of the tasks required to complete your project, and then you map them out on a project timeline. If tasks can be done simultaneously, then great – more time saved!

2. Waterfall
Waterfall is almost like the opposite of CPM. It’s a step-by-step approach where each phase of the project must be completed in its entirety before starting the next. When you plot out your schedule with waterfall, your project stages will look like this (and that’s where the name comes from!)

3. PERT
PERT stands for Program Evaluation and Review Technique. This is a project scheduling method that works by taking a look at all of the tasks necessary to complete your project and estimating how long you expect each one to take.

It’s quite similar to CPM, but the big difference is that PERT includes time estimates (usually split by best-case scenario, average, and worst-case scenario) to give a more accurate project timeline.
4. WBS
WBS stands for Work Breakdown Structure. This is a simple project scheduling technique that (unsurprisingly, given the name!) breaks large projects down into smaller, more manageable tasks.

This helps to ensure everything is covered and assigned, so you don’t miss anything and also so you don’t get overwhelmed by the enormity of the project.

How to make your own project schedule
1. Define your project objective
First thing’s first, you need to clearly outline the purpose of your project and the goals you want to achieve. Start by listing all of the key tasks that will need to be completed in order to make your project a success. This will help you to keep your project on track throughout and ensure you stay focused on achieving your objective!
2. Establish your deadline
Next, you need to set a realistic end date for your project. Of course, this will depend on many factors – so be sure to give yourself enough time to comfortably hit your deadline.
With a clear deadline and goal in mind, you’ll give yourself a strong sense of direction for your project.
3. Build out your timeline
Now it’s time to start actually building your project schedule! You need to take all of the key tasks from step one and organise them in a logical sequence that allows you to go from project start to project end – think of these like stepping stones!
When building out your timeline, it also helps to break your key tasks down even further, into subtasks. This way, you can really ensure all bases are covered and get a more accurate picture of how long you expect each part of your project to take.
4. Allocate resources
Once you have all of your tasks plotted out on a timeline, you need to start thinking about resources. It’s vital that you assign all of the necessary people, tools, and materials to each task – that way you can ensure you have everything in place and avoid bottlenecks.
5. Implement and monitor your schedule
The final step is to put all of this into practice and monitor your project schedule regularly. It’s important to keep everything in one place and to give access to the project schedule to everyone in your team.
Regular monitoring will allow you to update the schedule as needed when anything changes, for example if a team member is out sick or a client wants a change in direction. There will always be unforeseen challenges along the way but with regular monitoring you can keep on top of everything and ensure your project scheduling doesn’t go to waste!
The benefits of scheduling in project management
1. Creates clarity for your team
When your project is clearly scheduled, everyone knows what they need to do and when to do it. This helps to create clarity for your team, allowing everything to run smoothly.
2. Holds everyone accountable
In addition to creating clarity, a mapped out project schedule also helps to hold everyone accountable. It means that all deadlines and tasks are clear and this allows team members to take responsibility for their work.
3. Keeps projects on budget and on schedule
Project scheduling is obviously designed to keep your projects on schedule – the clue is in the name! But this attention to detail can also help to keep your projects on budget, by preventing overspending and reducing the likelihood of delays.
4. Highlights (potential) issues
When you schedule your project, it’s easy to spot any potential issues and flag these early before they become a major problem. That way, you can fix the issues and prevent bigger delays that could potentially have led to project failure.

5. Allows you to spot (and eliminate) risks early
Just as project scheduling can help you spot potential issues, it can also help to prevent, minimise, and even eliminate risks from your projects before you get started.
What are project scheduling tools?
We’ve talked about how important project schedules are, the ins-and-outs of how to make your own, and the many benefits. But it’s also worth mentioning that you definitely don’t have to go it alone! There are many project scheduling tools out there that can help you accurately plan your projects in a quick and easy manner.
Project scheduling tools are essentially software applications that you can use to plan, manage, and monitor the timeline of your projects. You can use a project scheduling tool to visualise your tasks, set deadlines, allocate resources, and track the progress of your project to ensure timely delivery.
Some project scheduling tools, like Project.co, even offer incredible AI features, the functionality to chat with project stakeholders, and the ability to take payments directly from the platform!
Create project schedules with Project.co
The first step to creating a project schedule with Project.co is to create a new project. You can do that by clicking the + button next to Projects, on the left-hand side of your dashboard:

From there, you’ll need to give your project a name and description, and add your team members and tools.

For the purposes of creating a project schedule, the tools you will need (as a minimum) are: Notes, Tasks, and Time.
Next, open the Notes tool and pop all of your important information in there, such as your project objectives, client contact information, and deadline.

You can also use our AI assistant here to generate anything – even a project schedule! 
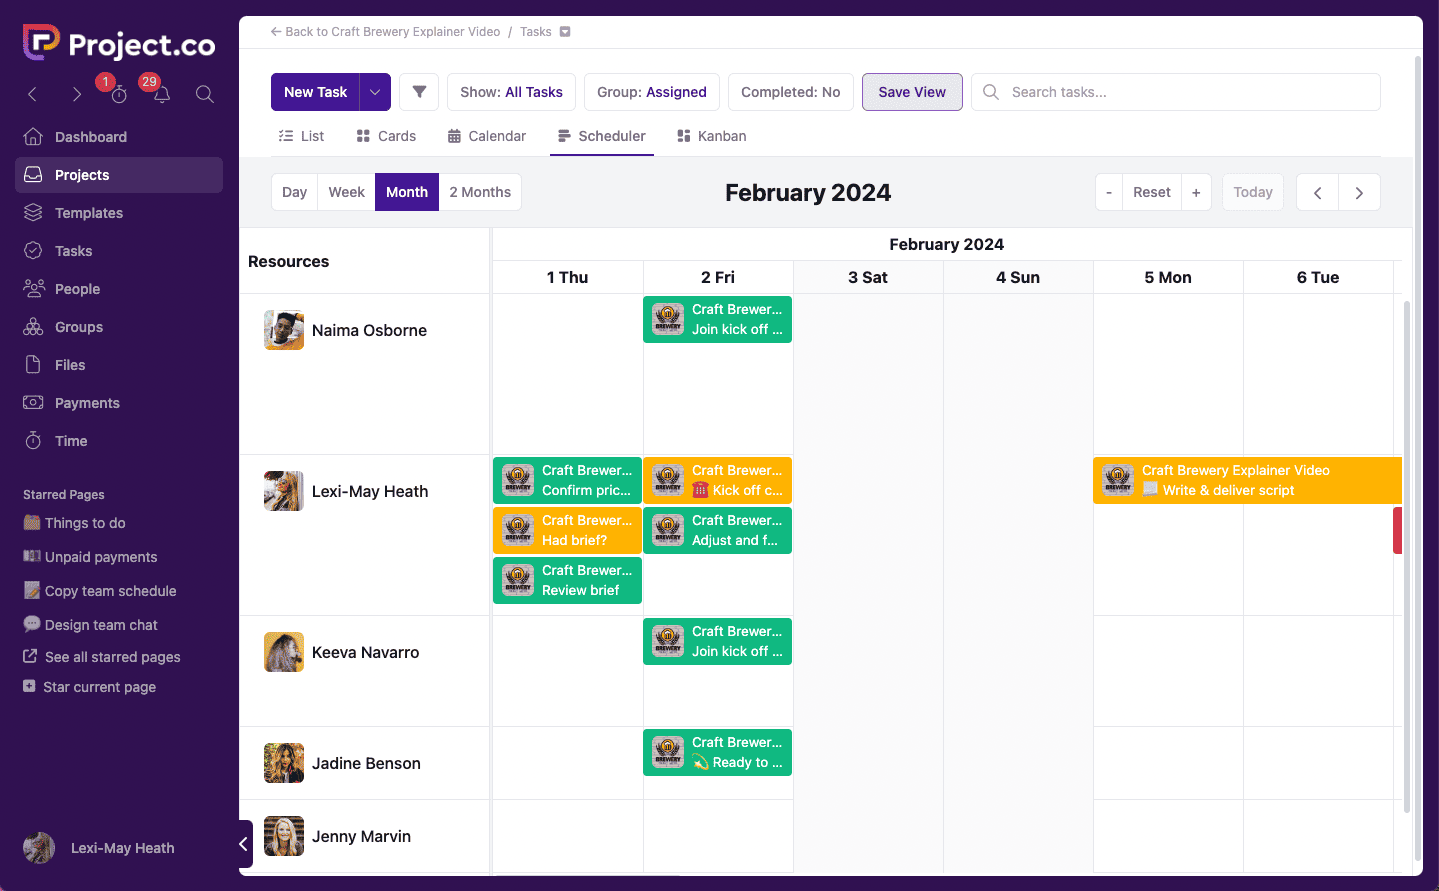
Then you can use the Tasks tool to map out all of your milestones. This is where your project schedule will really come to life! You can add due dates, team members, and even notes and files to each individual task:

And you can view your tasks in any number of Task views. For the purposes of project scheduling, the Scheduler view is likely the best one to use!
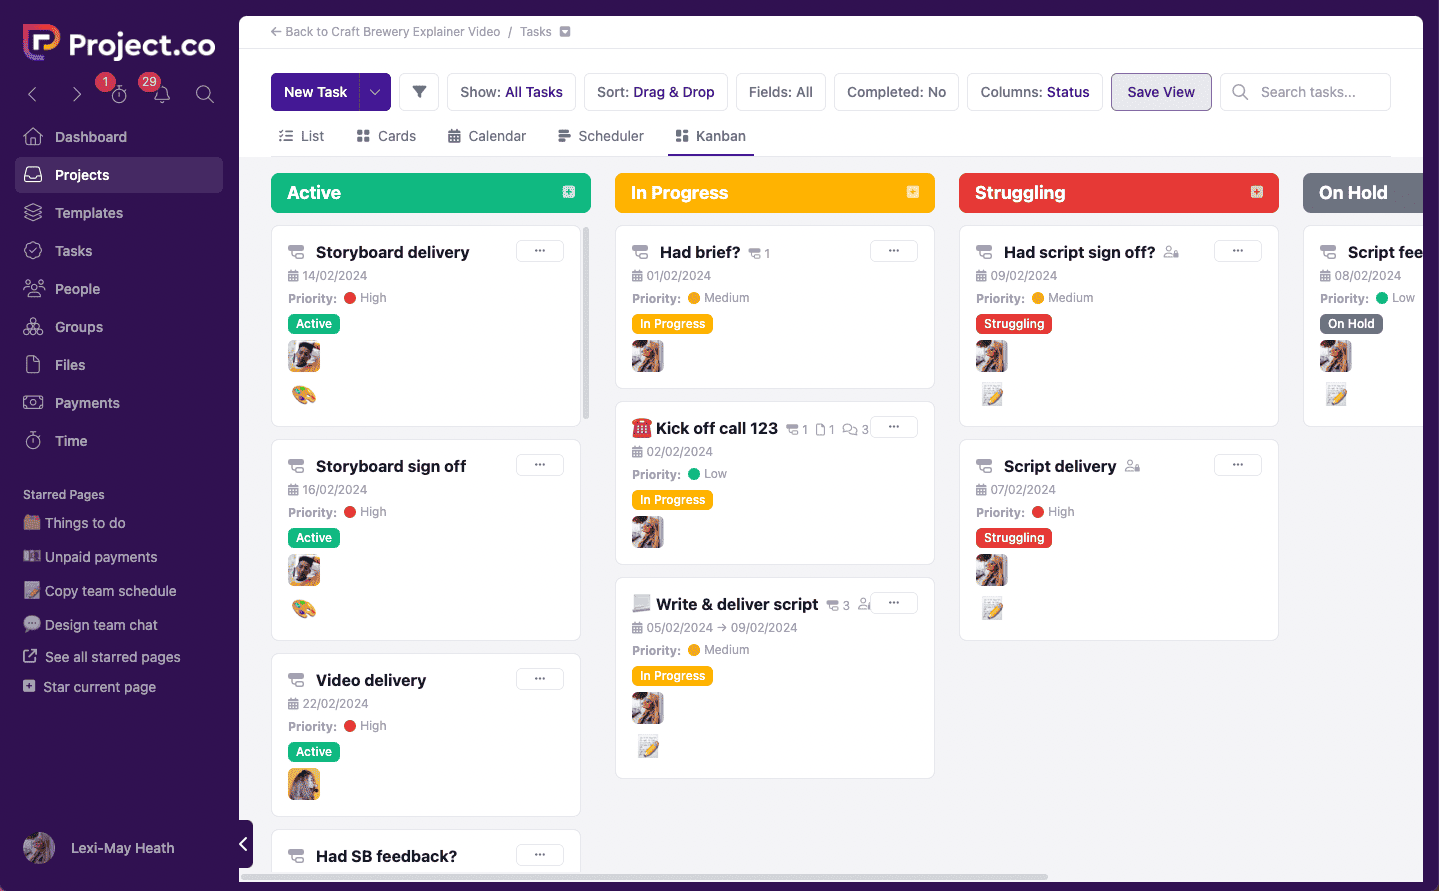
You can also use the Kanban view to get a clear picture of how your tasks are progressing. If you spot any bottlenecks forming then this is your queue to review your schedule and make changes.
You may also want to use the Time tool to track how much time is spent on each task.
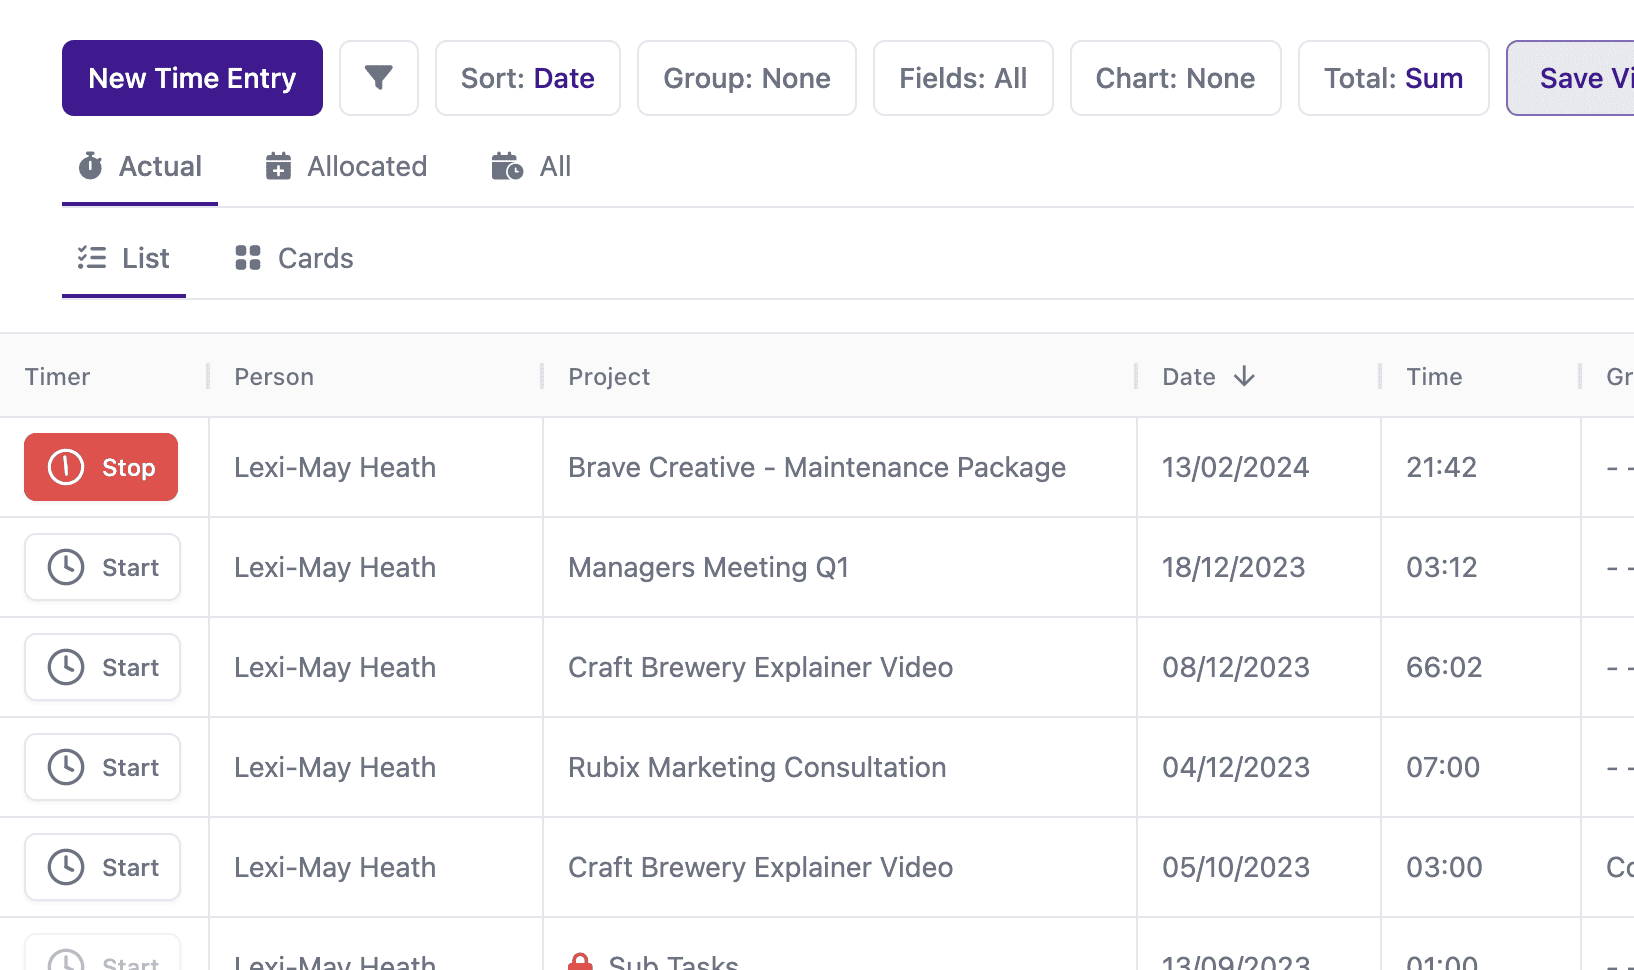
At the end of your project you’ll be able to see how many hours were spent and this can help you with budgeting and scheduling in the future.
Final thoughts
Creating a schedule will help you keep your project on track, and make sure that your stakeholders are happy and understand what’s happening at each stage, as well as what the next steps are.
Using a project management tool is the best way to create a solid schedule that you can update on the fly and share with everyone involved. Get started for free with Project.co today.
